Menus
The website can have multiple menus, each with its own structure and links. Menus can be managed from the Menu section in the admin panel.
Different menus can be assigned to different regions of the website (header, footer) or different subsites.
Open MenusManaging from Menu Structure
Section titled “Managing from Menu Structure”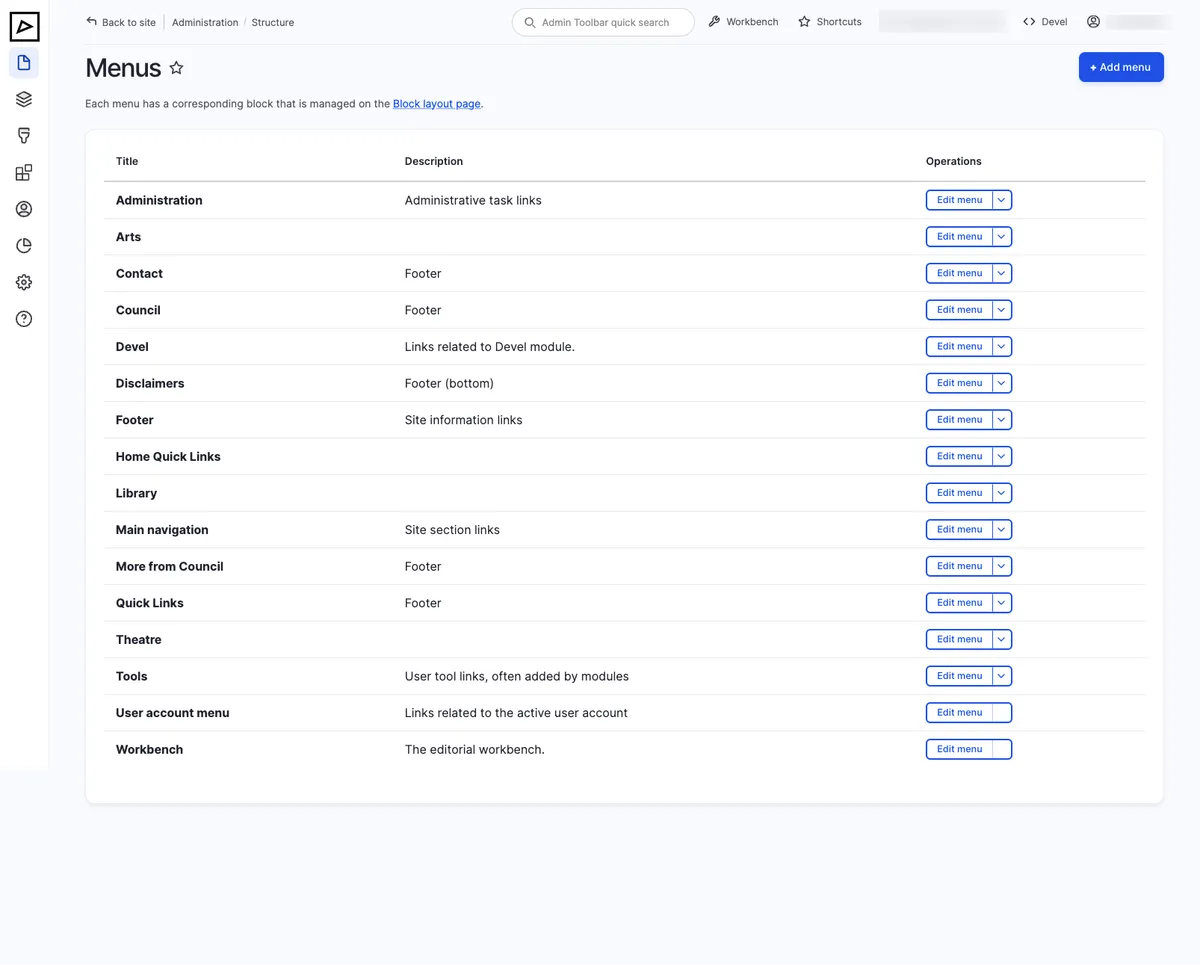
Click Add menu to create a new menu, or Edit menu to edit an existing one.
Creating a new menu item
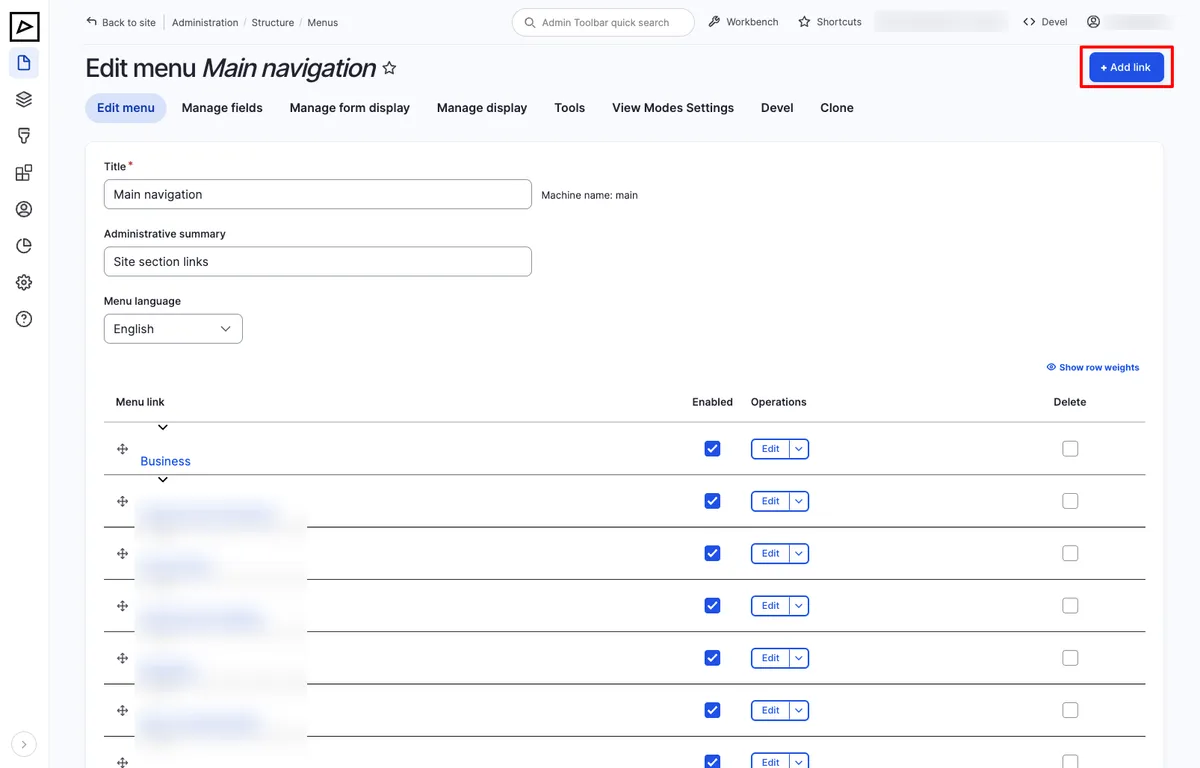
Section titled “Creating a new menu item”- Click Add link in the menu you want to add to
- Enter the link text and URL (start typing a page title for autocomplete)
- Optionally set a description and parent item
- Save
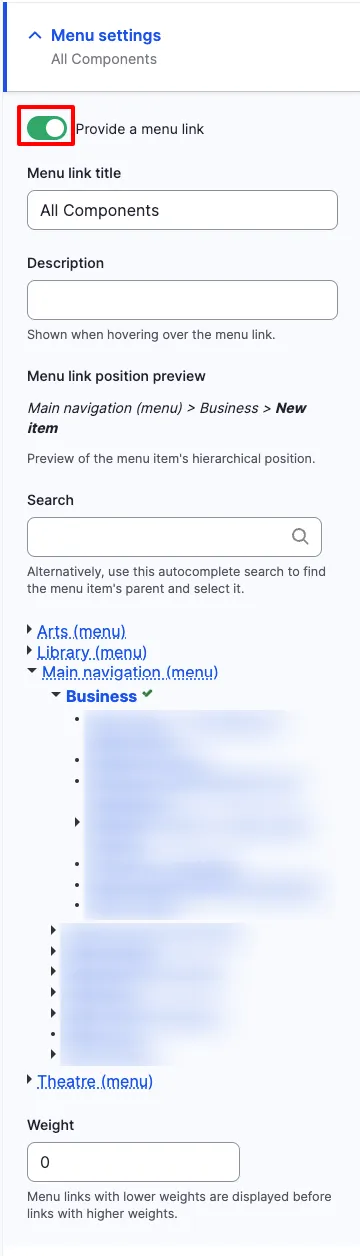
Alternatively, create a link from the content type by selecting Menu settings → Provide a menu link. See Managing from Content below.
Editing a menu item
Section titled “Editing a menu item”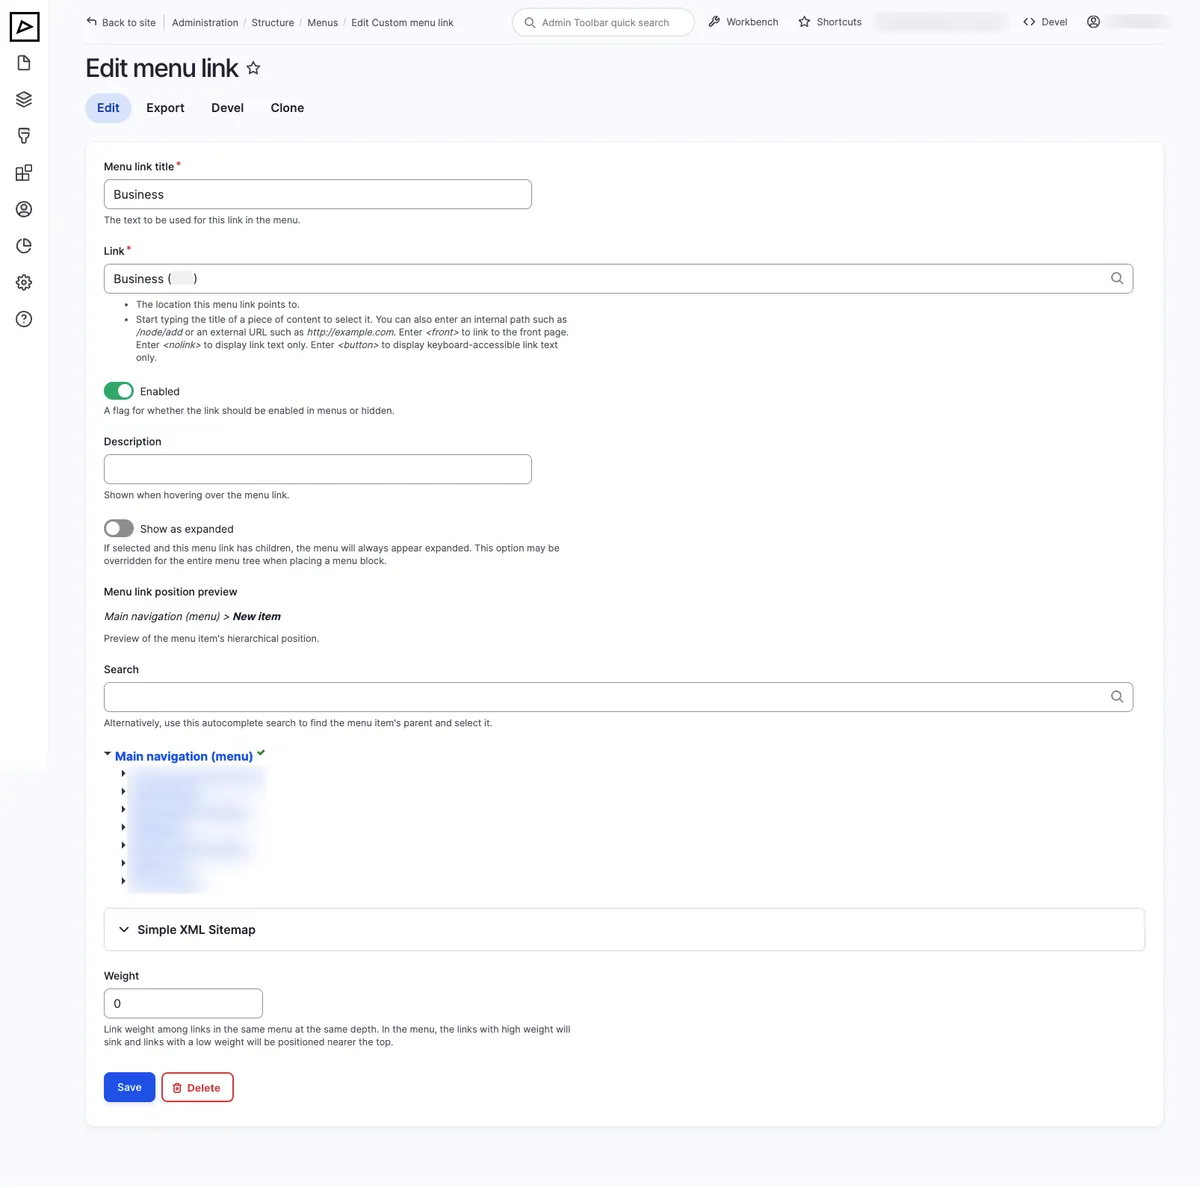
Deleting a menu item
Section titled “Deleting a menu item”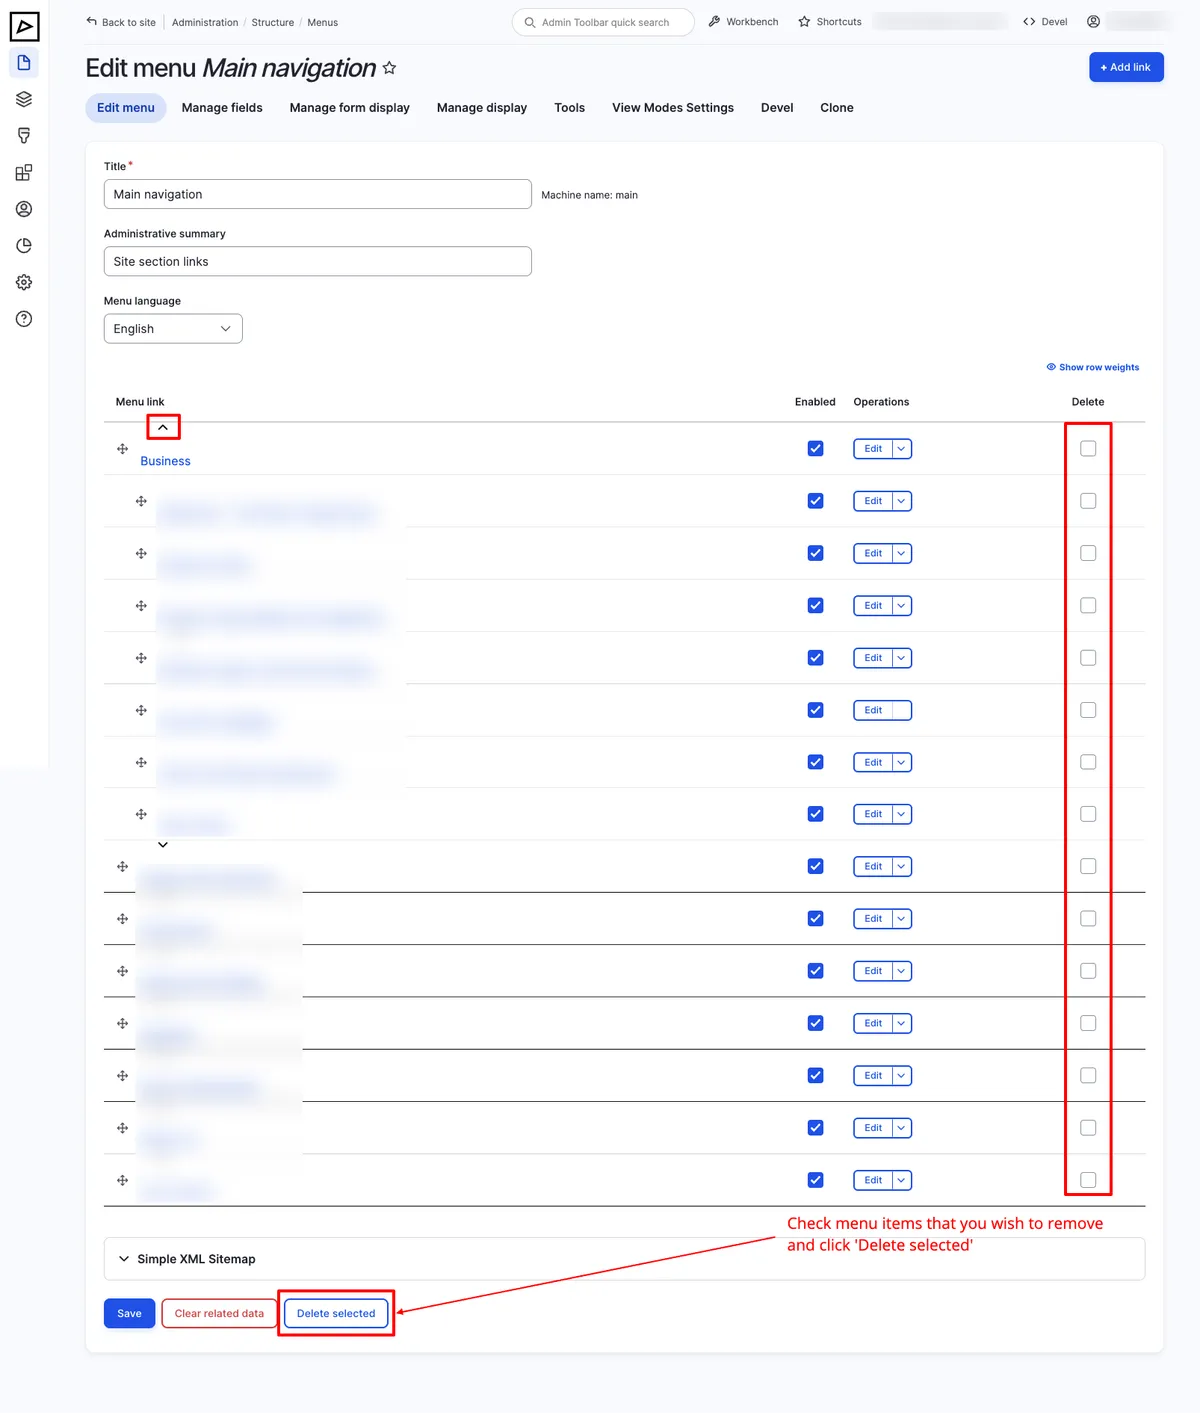
Alternatively, click Edit and then Delete at the bottom of the page.
Reordering menu items
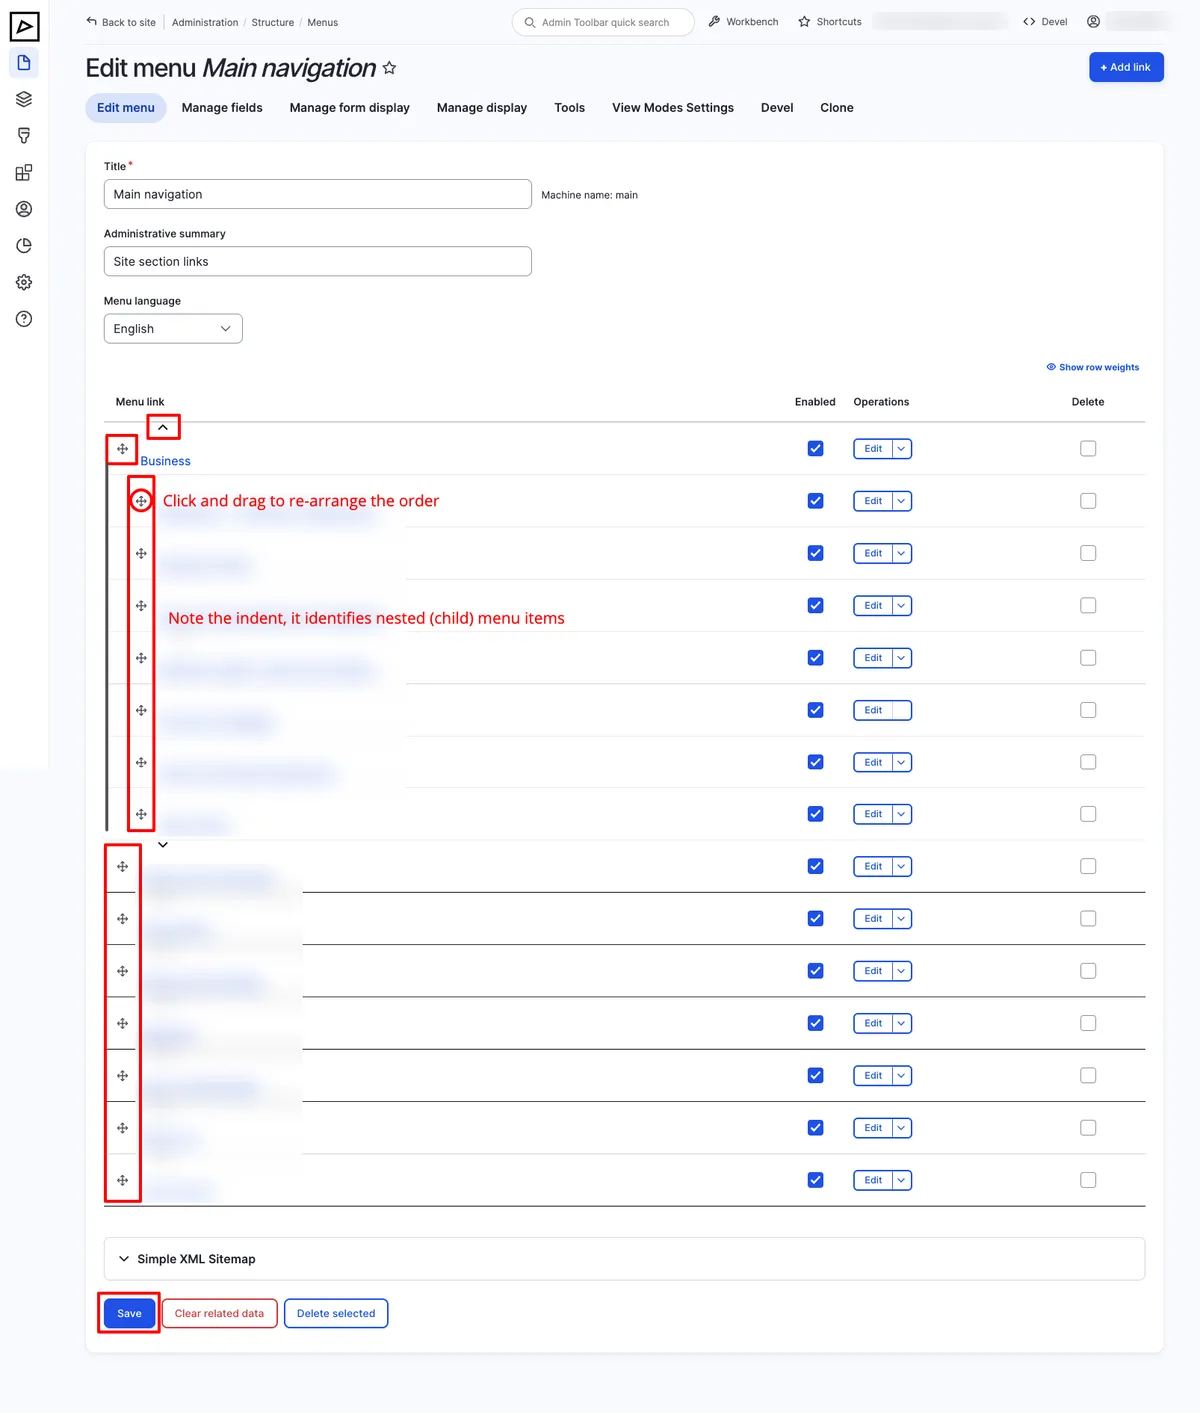
Section titled “Reordering menu items”Drag and drop menu items to reorder them, then save.
Managing from Content
Section titled “Managing from Content”When editing a content item, expand Menu settings and enable Provide a menu link. This creates a menu link pointing to the content item.
Assigning a primary menu to a subsite
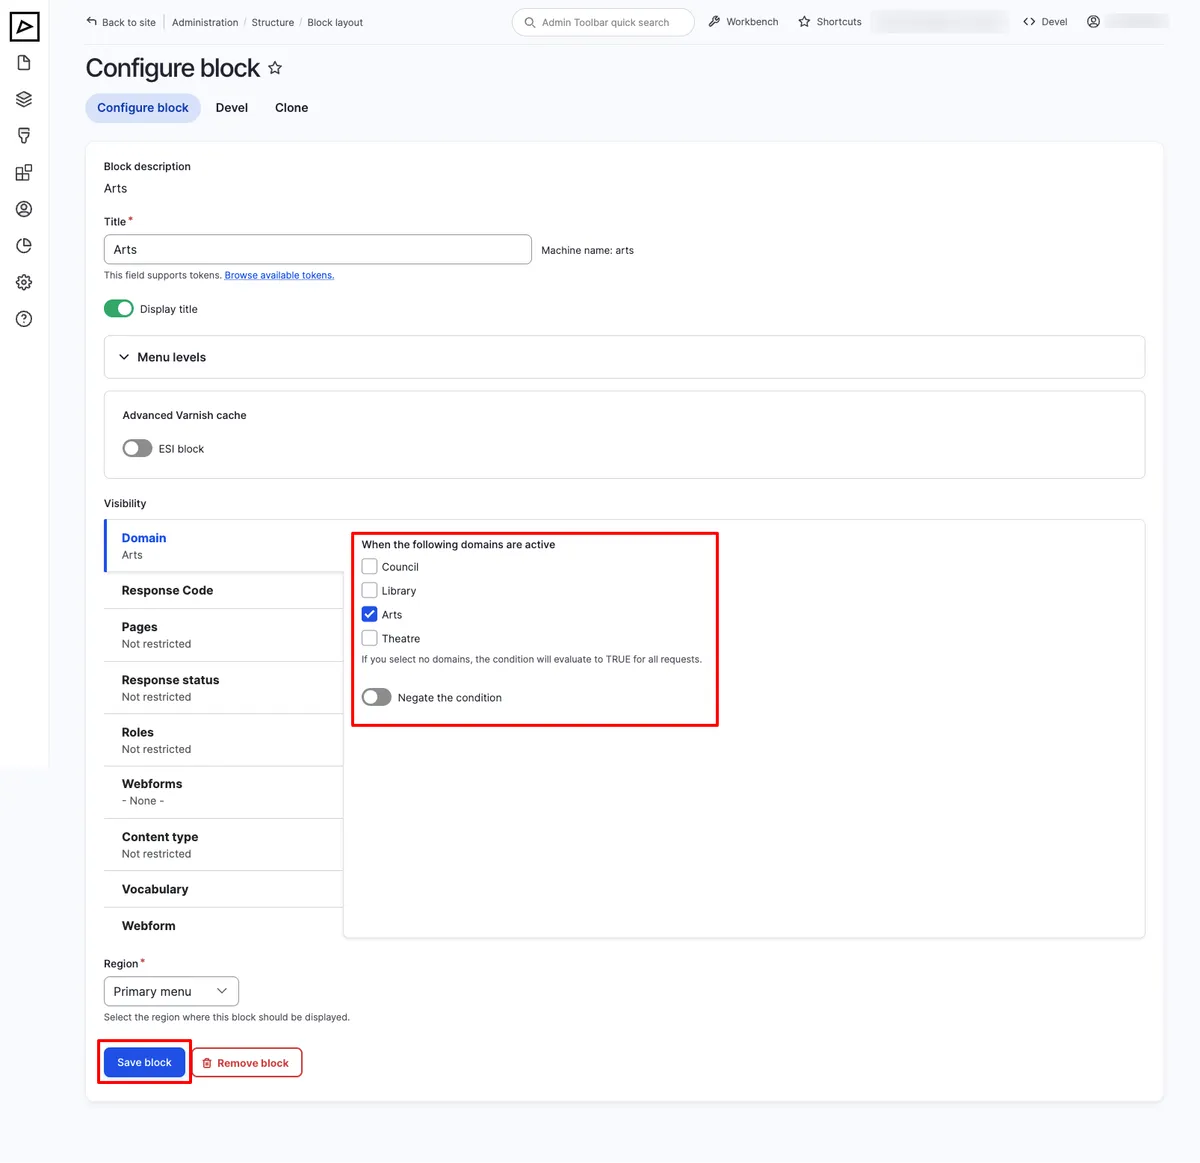
Section titled “Assigning a primary menu to a subsite”- Click Block layout page on the Menu Structure overview page
- Scroll down to Primary menu and click Place block to add a new menu, or Configure to edit an existing one
- Select the menu and configure the visibility settings for the subsite
- Save